Yippee! Planting day!

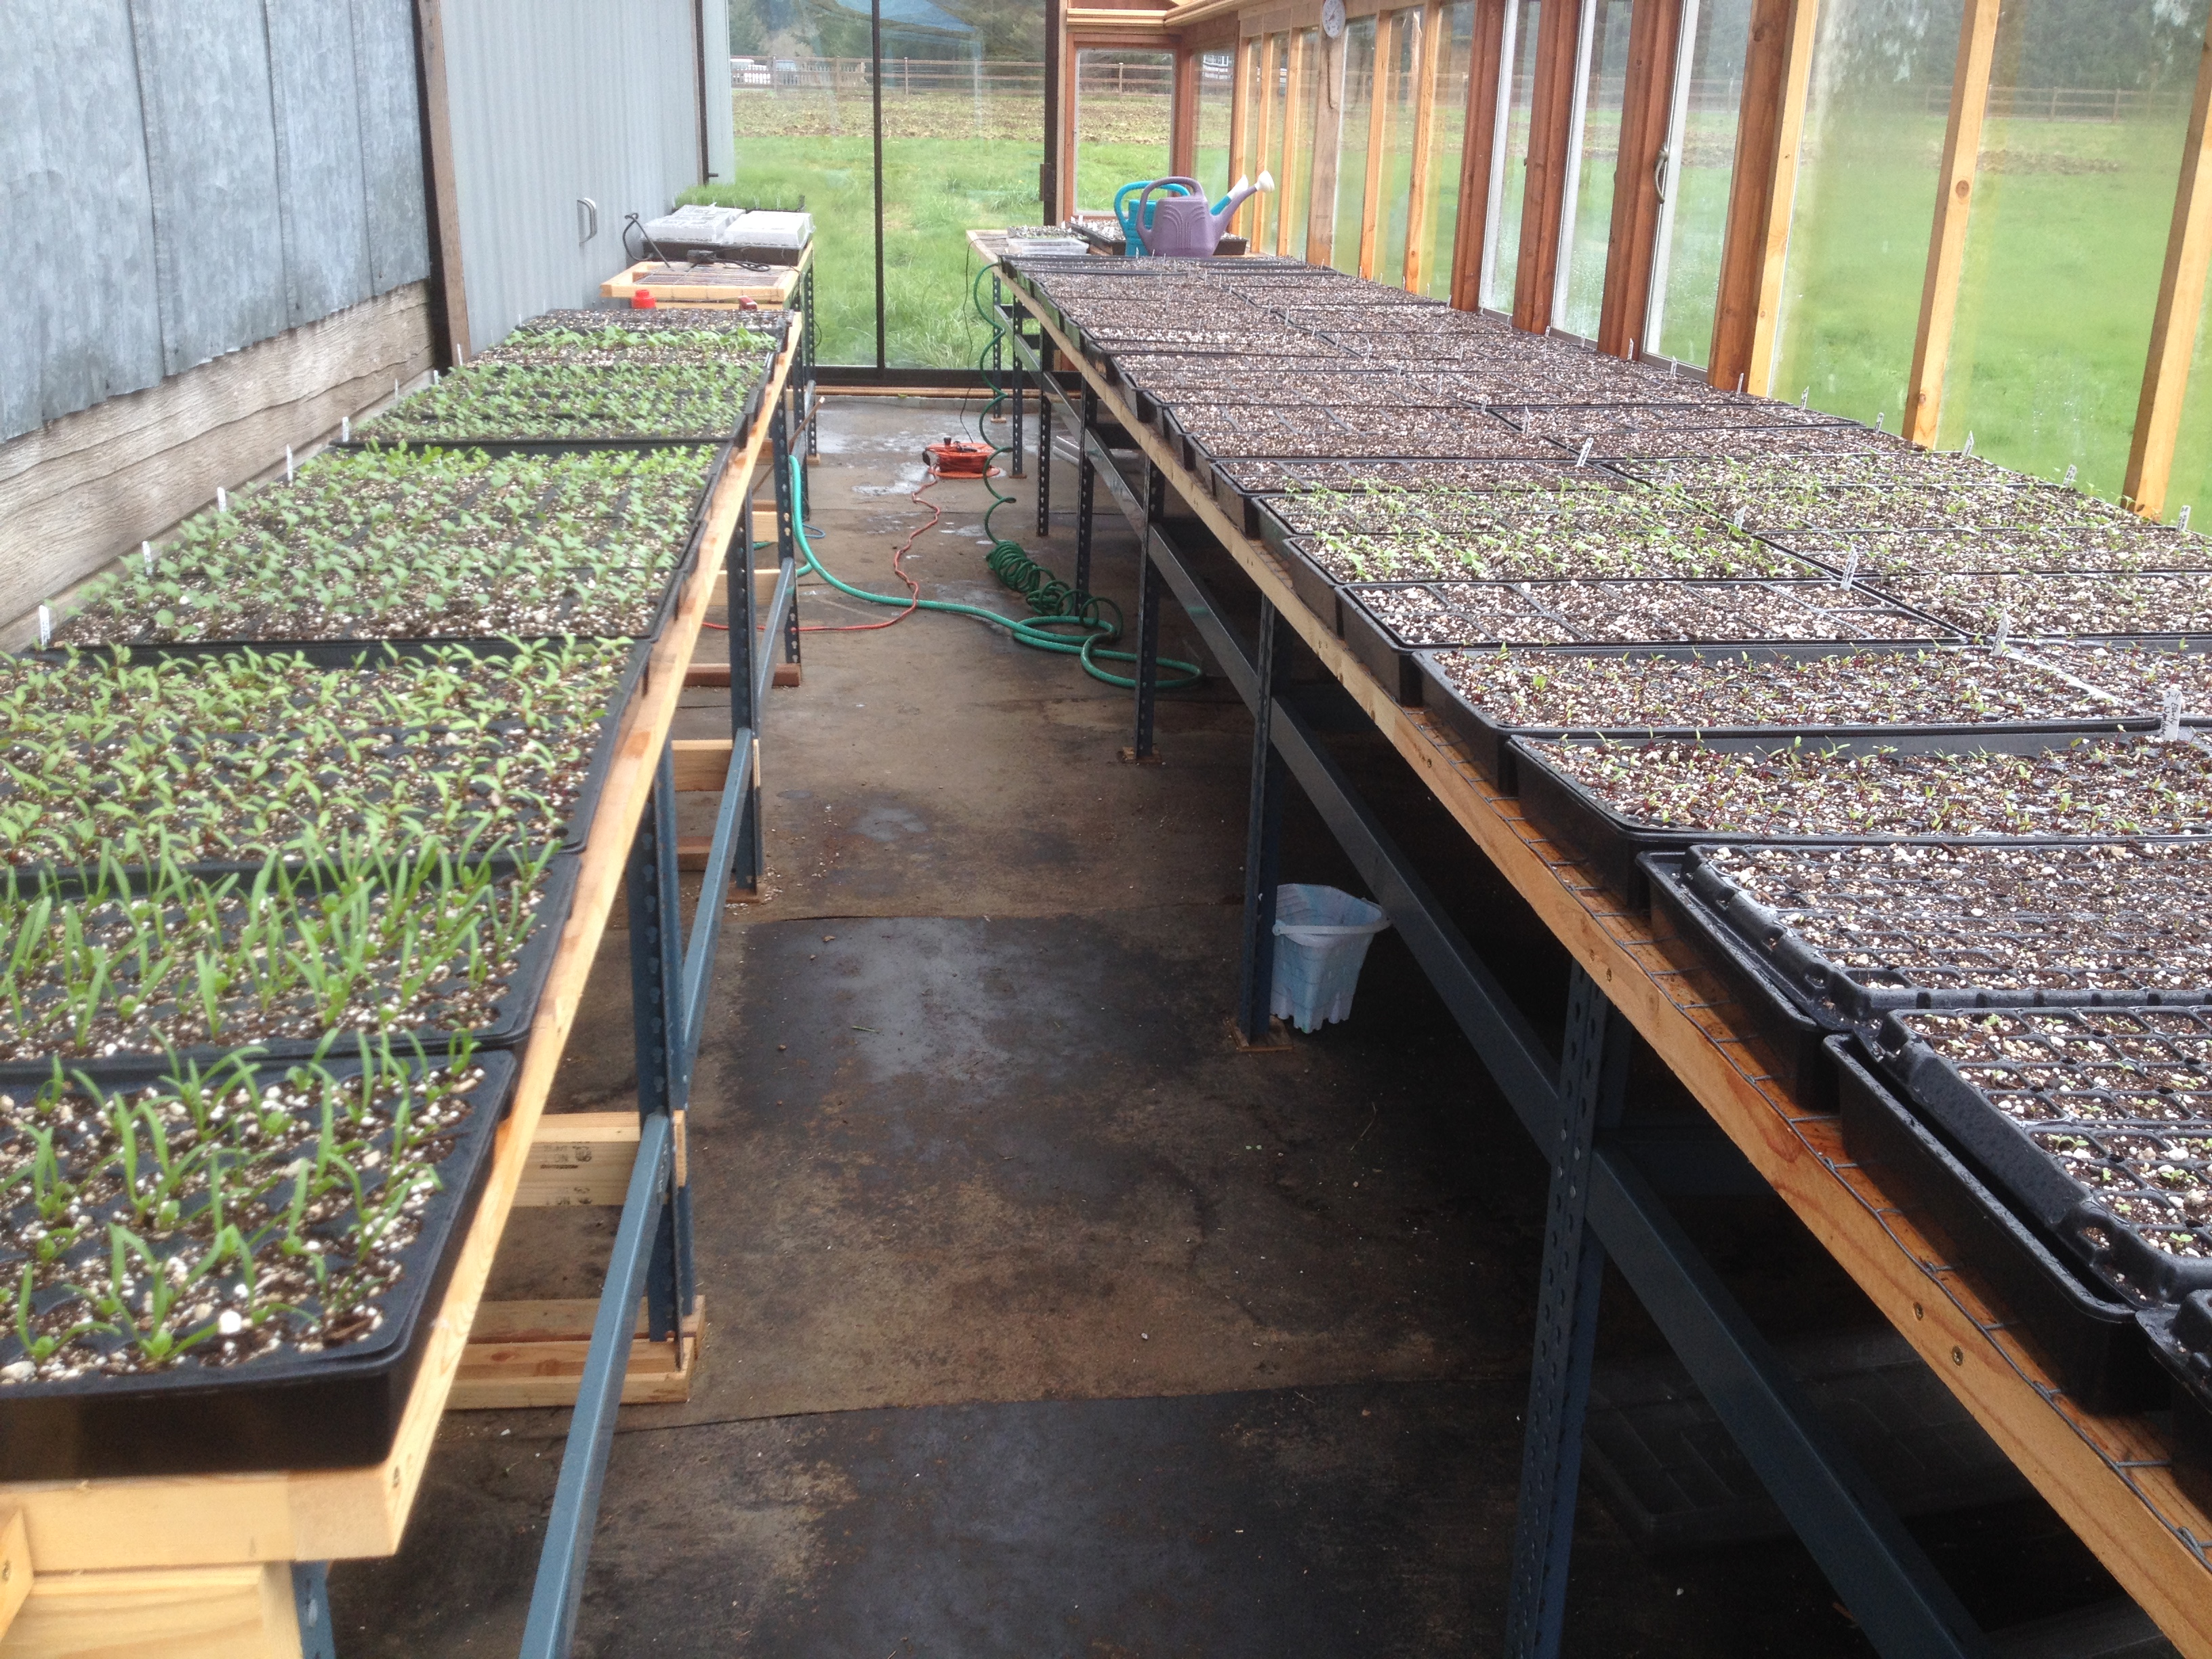
Today, I woke up to blue sky and a perfect day for planting!! Fueled by the promise of fresh vegetables and over-caffeination, I raced around this morning gathering seeds that need planting, moving flats of seedlings outside to harden off and found the best ground ready for planting!

We started with potatoes! Dad and I took turns using the wheel hoe to dig a furrow for the potatoes…so much easier on your back than digging with a shovel!

2015-03-30 001 014

Once the furrow was deep enough and all the big rocks removed, in went the potatoes! Here are the Rose Golds:

2015-03-30 001 017

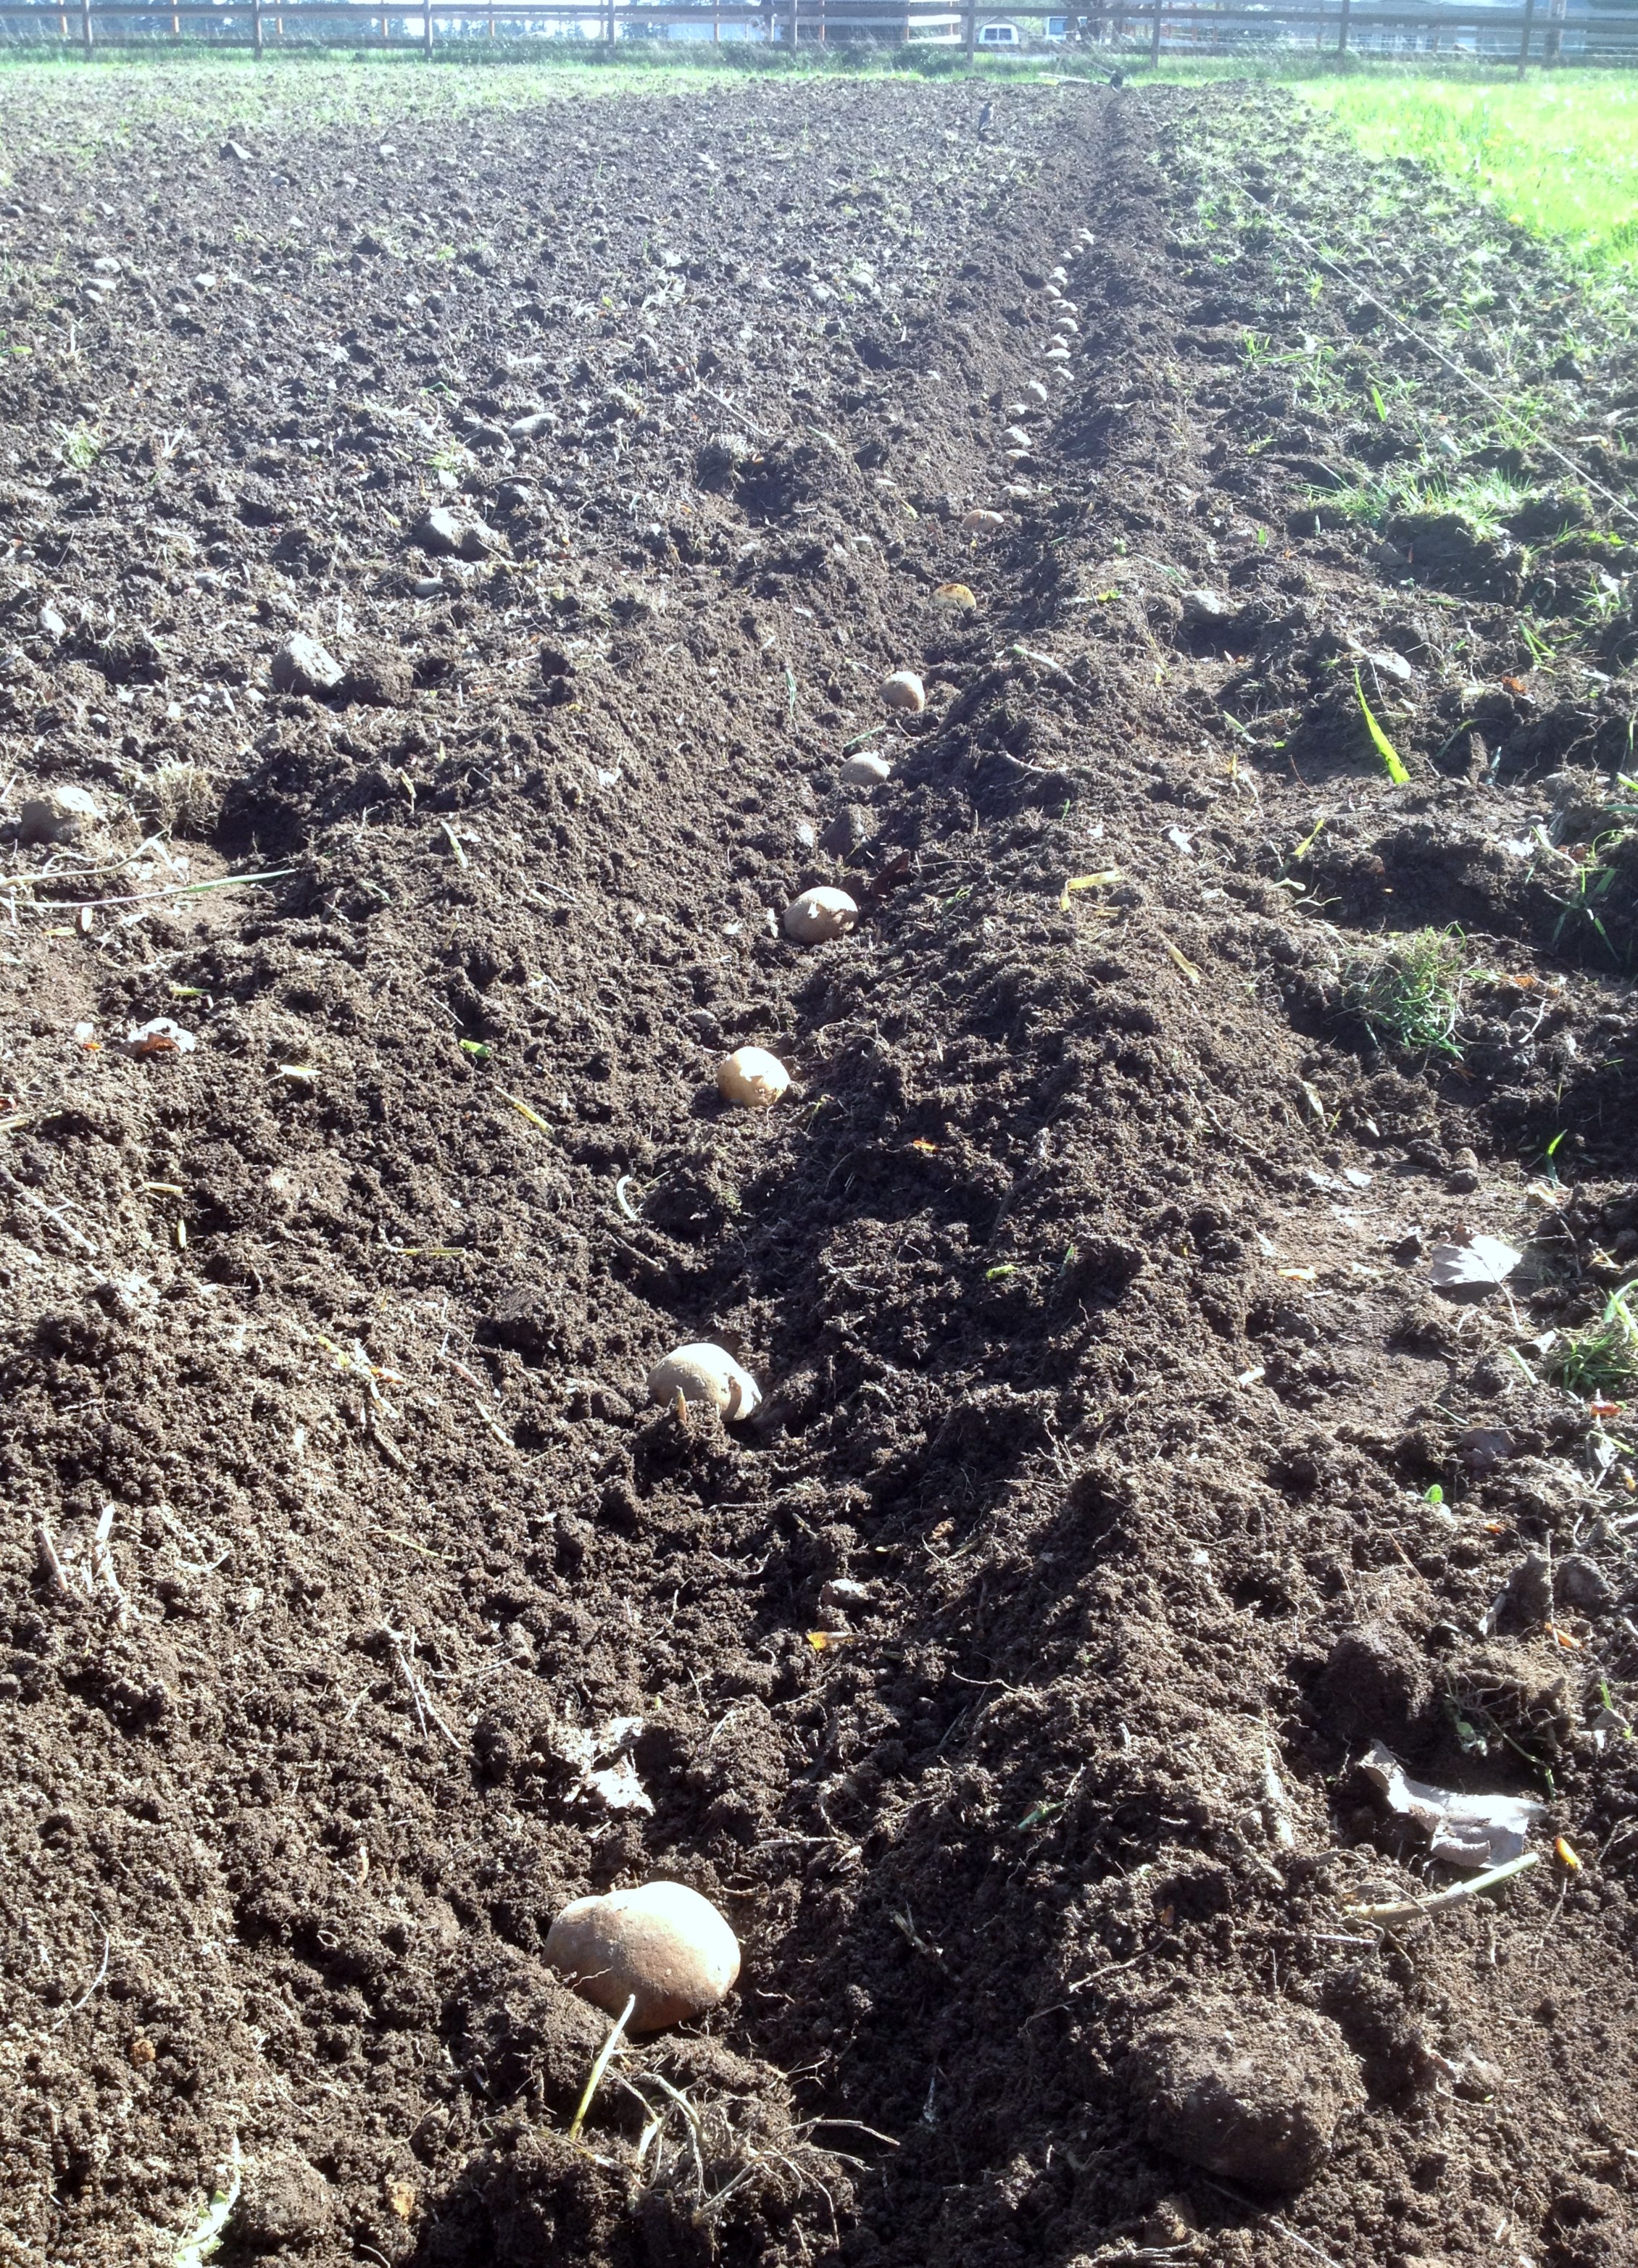
We also planted Huckleberry Gold, Yukon Gold and German Butterballs!

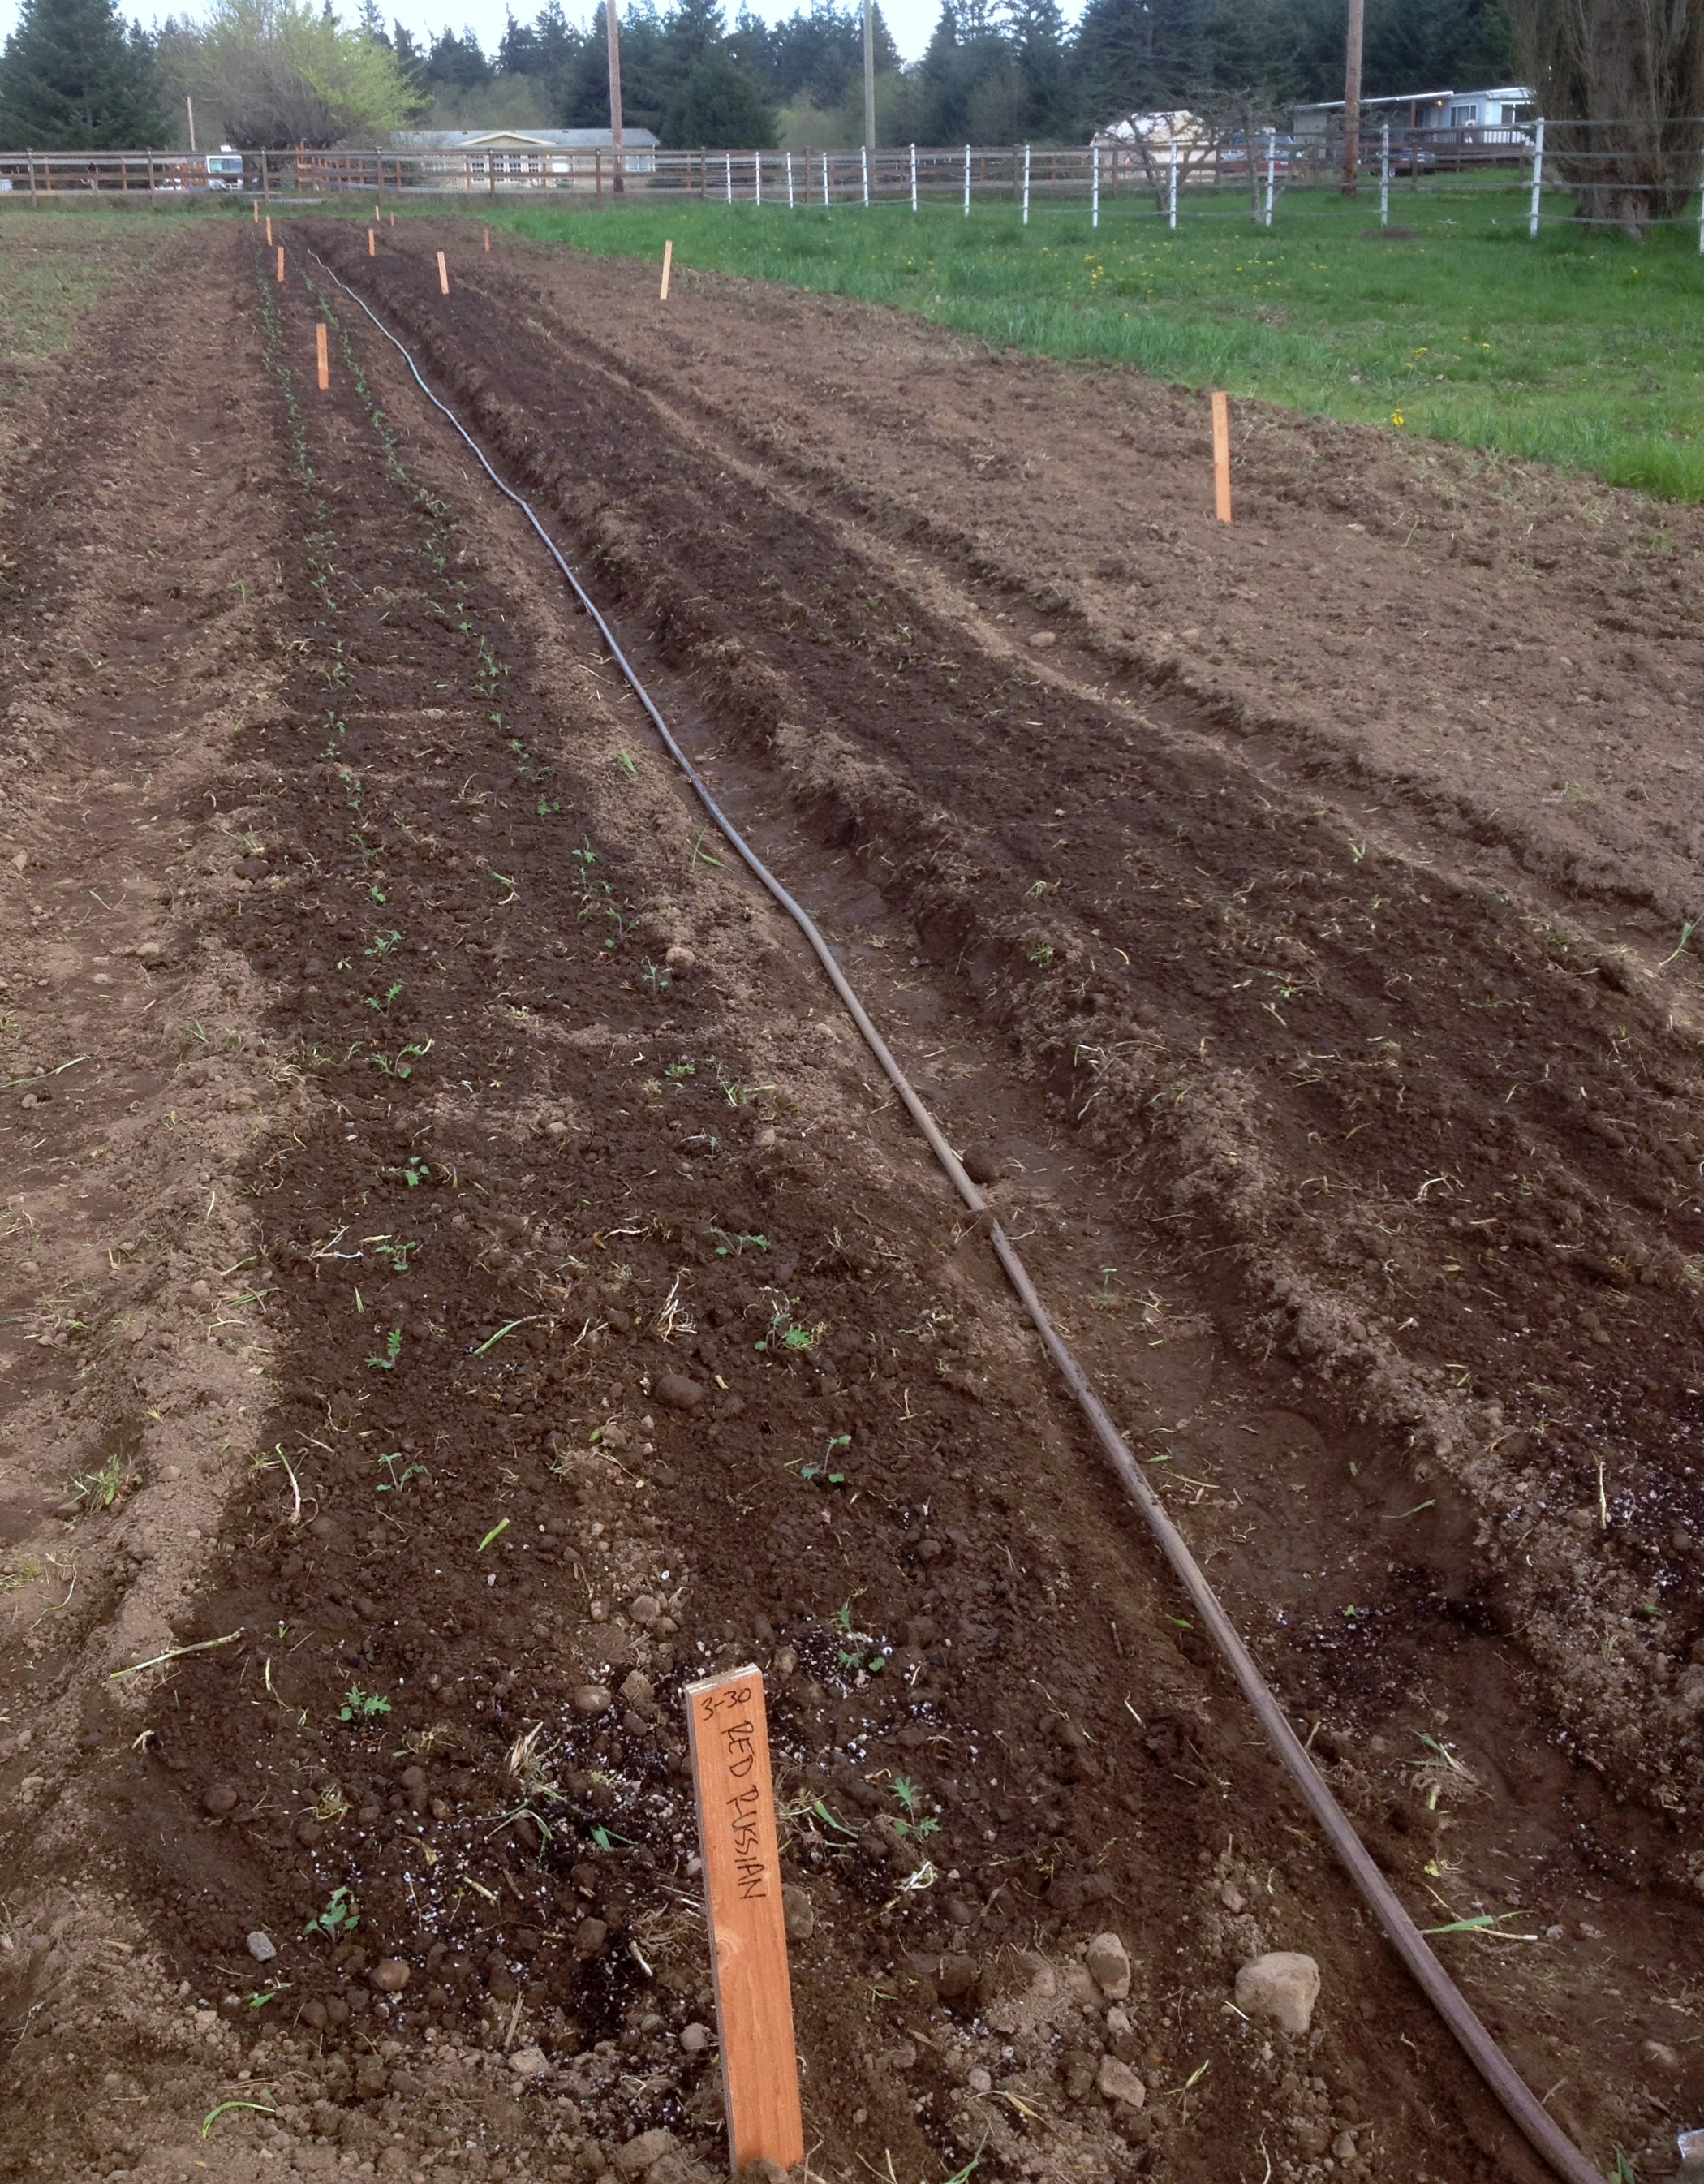
Next, we planted half a bed of carrots, an orange and a yellow variety. The very delicious Carrot is a diva that will grow into funny shapes without a nice fluffy, rock and clump free bed. The carrot is worth the extra effort, so we dug out the paths, adding a little extra depth to the bed and went through by hand to remove rocks and clumps and roots left behind by the cover crop. The second half of the bed will be planted in a week or two.

We finished the day transplanting three varieties of kale and one variety of cauliflower. This bed did not get the same attention to detail that the carrot bed enjoyed. It was measured, the path walked out and we raked it once to get out the really big rocks (There is quite the rock pile growing, I wonder if the Whidbey fighter jets that fly over can see it yet).

2015-03-30 001 018

Tomorrow, if it stays dry, we will plant more outside (chard, spinach, radishes)! If it rains and storms as predicted, there is another bed that is waiting to be planted inside the hoop house and more flats to be seeded!

2015-03-26 001 003

2015 Vegetable Challenge!

I was recently told that there are over 200 produce items available at the grocery store, but the average person only eats about 15 of them. Next time I am at the grocery store, I plan to count everything in the produce section or perhaps I will start with asking someone who works in the produce section.

Anyway, it got me thinking! I looked at my seed list and I have everything divided into 39 categories (these are not official categories, just my categories) with 155 different varieties!! The 2015 Vegetable Challenge is to pay attention to how many different things you eat from the produce section or buy from a local farmer and then see how many you can eat in 2015! I would love to hear about new favorites and good recipes!

Today, we planted two beds in the hoop house! The tiny white tags tell you that we planted 2 varieties of lettuce plus a lettuce mix, 2 varieties of radish, 3 varieties of mustard greens and 1 variety each of spinach and arugula!

2015-03-16 001 008

If you are interested, here is my list of categories and the number of varieties per category…

  • Basil: 1
  • Bush Beans: 5
  • Fava Beans: 1
  • Garbanzo Beans: 1
  • Beets: 5
  • Broccoli: 5
  • Brussels Sprouts: 4
  • Cabbage: 8
  • Carrots: 8
  • Cauliflower: 3
  • Celery: 1
  • Chard: 1
  • Chives: 1
  • Cilantro: 2
  • Dill: 1
  • Popcorn: 1
  • Cucumber: 7
  • Eggplant: 1
  • Fennel: 2
  • Kale: 3
  • Leeks: 3
  • Lettuce: 11
  • Melons: 5
  • Mustard Greens: 7
  • Onions: 3
  • Peas: 1
  • Peppers, Hot: 2
  • Peppers, Sweet: 5
  • Potato: 4
  • Pumpkins: 1 baking; 3 jack-o-lantern
  • Radicchio: 1
  • Radish: 3
  • Rutabaga: 1
  • Shallot: 2
  • Spinach: 3
  • Summer Squash: 10
  • Winter Squash: 9
  • Tomato: 22
  • Turnip: 1

Dramatic End to Deer Fence Saga!

Yesterday, as we stretched the last section of fence, I spotted two deer…INSIDE the fence. After chasing them for an hour, one jumped a short section of fence leaving the other one behind. I left all my gates open, hoping the remaining deer would find the way out overnight. No such luck…

2015-01-27 001 008

We knew this deer could not jump any part of the fence, so the plan was to herd the deer around the perimeter of the property and out the one gate.  For this to work, we needed to create a barricade to keep the deer from continuing on past the gate…we lined up 3 cars and the tractor and covered them with tarps.

2015-01-28 001 008

Some friends headed over to help and we needed them! On our first try, the plan nearly worked, but the deer turned at the last second and took off in the opposite direction of its gate to freedom. Every time we successfully got the deer up to the front of the property near the gate, it would turn and sprint back to the shelter of brush and trees. More than once, the four of us thought we were herding the deer through the brush, while the deer had snuck past us and was on the opposite side trying to find an opening in the fence.

It became clear that the biggest flaw in our plan was the deer felt more comfortable on the backside of the property in the brush and trees than in the open fields near the road where the gate is. New Plan! We cut a hole in the fence at the back corner of the property and after a few tries, the deer found the hole and was gone! We patched the hole and our fence has passed the test!

Getting that deer on the outside of the fence was a dramatic end to a huge project! The deer fence almost four weeks to build and 8 rolls of field fence (2,640 ft). This project took me to parts of my property that I had not yet seen and it turns out that building an 8 foot fence is a good way to meet your neighbors! Working near the road gave me a chance to chat with some neighbors who were out for a walk!

NEXT PROJECT: Construct hoop house! I ordered a custom made hoop house kit from Steve’s Greenhouses (http://stevesgreenhouses.com/) and it has been patiently waiting in the barn for the deer fence to be done! The hoop house will be 20ft by 96ft!

Deer Fence Saga Continues

Progress is happening on the deer fence! We are half way!! The North side is done! Half of the west side is done!

This morning started in the back corner with a view of what the deer now see from my neighbor’s property!

2015-01-19 001 015

Last week, we got the north leg of the fence up. Thanks to our handy fence stretcher tool, the first 4 feet went up pretty smoothly! You can see in this picture that the first half of the fence is up and dad is rolling out the next roll of fence to be attached above to make a total of 8 feet tall.

2015-01-13 002 003

I thought attaching the second roll of fence 4 feet off the ground would be the hardest part of this saga, but it turned out to be the task that produced the least amount of head-scratching and loud declarations that deer are difficult!

2 x 4’s held the fence in place, making the stretching and attaching almost easy!

2015-01-13 002 013   2015-01-13 002 018

Today, we got half (330ft) of the west side of the property fenced!

2015-01-19 001 021

So far, the weather has been perfect for this project. We only got rained on the very first day of clearing the fence line! It has been quite foggy in the morning and sunny in the afternoon!

2015-01-13 001 006 2015-01-13 001 005

Deer Fence Saga

Yes, the construction of the deer fence has been upgraded from a project to a saga.

I have lots of t-posts from all the horse fencing that came with the property, but they are not tall enough for the 8ft deer fence that I need. The original plan was to drill two holes into each t-post and bolt them together.

2015-01-07 001 019 (615x640)After two trips to the hardware store and 6 dulled drill bits that no longer worked, we had 14 t-posts with two holes drilled into them. Only 240 more t-posts to drill holes into. Dad and I calculated how many more drill bits we needed, reminded ourselves that Pete Carroll says every challenge is an opportunity for success and then we stopped for lunch.

New plan! We will wire the posts together! Luckily, there is a ton of electric wire on the back fence line that we uncovered a couple days ago. This wire will be cut and used to tie 2 t-posts together to make one 9ft t-post. Originally, we were going to put up a 6 ft fence and run the wire above the fence to get to 8ft tall. But, I bought 4ft field fence and our plan is to run a lower and upper roll to get to 8ft (Do not worry, an installment of this saga will contain pictures and stories about how we are going to unroll and stretch 330ft of field fence 4ft off the ground. Perhaps, to offset the cost of all the fence, I will sell tickets to watch what promises to be an entertaining portion of the Deer Fence Saga!!).

After lunch, we got to work attaching the t-posts with wire and started to make progress!

2015-01-07 001 026 (640x640)2015-01-07 001 027 (640x640)

So, it was one of the those days were much less was accomplished than originally planned, but we are ready to keep moving with our new plan and it was a gorgeous day to be outside!!!

2015-01-07 001 005 (628x640) 2015-01-07 001 004 (480x640)

New Deer Fence Plan!

After wandering around the farm and discussing deer fencing options, we are moving in a different direction than stated in my previous post! We figured extending the height of the existing fence line around the property would be easier, cheaper and more aesthetically pleasing!

Today, we started the first step of clearing the blackberries and other brush from the existing fence line! My dad cleared the way with a brush cutter and chainsaw…

2015-01-05 001 009

The rest we cleared by hand and look…A very straight fence line appeared!!

2015-01-05 001 007

Next Project: Convert Horse Fence to Deer Fence

The local deer are enjoying meals of my rye grass and vetch cover crop! They have also learned that I have terrible aim and the rocks I throw will not hit them.

We used the tractor to pull out a bunch of the horse fencing.

2014-11-19 001 010 (640x480)2014-12-13 001 003 (640x480)

Our next step is to extend the existing fence the length of my property. It will be much higher than the horse fence!

I plan to only fence areas where I will grow crops. There is plenty for the deer to eat on the edges of my property that I am leaving wild to provide natural habitat to hopefully attract birds and beneficial insects!

2014-12-10 001 003

Propagation Greenhouse Construction

The propagation greenhouse or prop house is a warm, sunny place for seeds to germinate and grow until they are ready to be transplanted into the field! I will start my seeds in plug trays:

?????????????????????????????The majority of the prop house was built from reused materials! We decided to build it off one side of the barn, so we only had to construct three walls!

2014-11-13 001 023 (640x480)The city greenhouse my dad made for me became the corners and middle of the prop house.

photo (2)2014-11-19 001 002 (640x414)Removing walls in the barn left us with a pile of plywood and 2 x 6 boards that made up the rest of the prop house frame and walls!2014-12-02 001 030 (640x480)Horse stall pads are now the prop house floor. They are super heavy!

2014-12-02 001 027 (480x640)Both end walls have sliding glass doors and the triangle above the door pops out for ventilation

2014-12-02 001 029 (640x480)

Now the tables have been added and I am ready to start seeds!!

2014-12-10 001 019 (480x640)A huge THANK YOU to my dad for all his planning, material scavenging and work!!

Thank you to our friend, Satch, for his help constructing the tables!

How did I end up as a Farmer on Camano Island?

I just sent in my business license application and registered a domain name! I am so excited to start a small farm! So far, it has been a blast to watch the farm grow and transform from a place where horses lived to a place where food will grow. I have ended up in a place that I never imagined for myself and I am so thankful for all your support in this journey! I thought for my very first blog post I would recap how I got here!

After completing my Masters in Social Work, I took a job working for the State of Washington in child welfare policy. I was quickly promoted and doing well, but the job was emotionally very hard on me. In addition to the difficult work, I found it challenging to sit at a desk all day long. I grew up on a Christmas Tree Farm in Arlington, WA and ate many meals from our family garden. I missed working with my hands and doing work that I could see concrete results from. I began spending all my free time gardening and raising chickens in the backyard of my house in Ballard. To better understand plants and growing food, I absorbed all the information I could from classes offered by Seattle Tilth and the Horticulture program at Edmonds Community College.

After seven years of working for the state, I took a job with a residential landscape company. Although I really enjoyed the work and was thrilled to be outside, I decided that I was really passionate about growing food. I wanted my next job to be related to urban farming in Seattle and felt that spending a full season as a farm intern would give me the experience I needed to get that job. I moved into a cozy cabin on Hogsback Farm on Vashon Island and spent the season immersed in a small scale farm. As I completed my farm internship on Vashon Island, it became clear that I needed to keep farming and was ready to move out of the city! I was curious about larger scale farming and interested in living north of Seattle, so I sold my house and moved to Whatcom County where I completed a second full season farm internship at Cloud Mountain Farm Center.

After much thought and discussion about what I wanted my next steps to be, I decided to look for some land to start my own farm. My dad helped me find a beautiful piece of property on Camano Island. It fit perfectly my visions of starting my own farm and I look forward to becoming a part of the community here!

Check back to see my progress and for updates on my farm stand that will open Spring 2015!